SMT100 Modbus mit ioBroker

Es gibt inzwischen so viele Smart Home Systeme, dass die Auswahl immer schwieriger wird. Ich kann mich noch gut an das Jahr 1982 erinnern, als an der Carnegie Mellon University ein Cola Automat mit dem Internet verbunden wurde. Damals hatte ich mich schon intensiv mit den dazugehörigen Datenübertragungsprotokollen TCP und IP beschäftigt, die auch heute noch die Grundlage des Internets bilden. Meine erste drahtlose TCP/IP Verbindung erfolgte mit 1200 baud Schrittgeschwindigkeit, ein Bruchteil der heutigen Übertragungsraten. Webtechnologien waren damals noch nicht erfunden, so dass ich mir mit Tastern, Glühlämpchen und einer alten Türklingel eine Alarmzentrale zur Überwachung von Weidezäunen baute. Heute probiere ich der Reihe nach die verschiedenen Smart Home Systeme durch, um die Vor- und Nachteile  der verschiedenen Möglichkeiten zu verstehen und die beste Auswahl zu treffen. ioBroker habe ich dabei schon etwas länger im Fokus. Mein erstes Ziel war auszuprobieren, wie leicht man ein Modbus Gerät an ioBroker ankoppeln kann. Als Standardtestobjekt habe ich dazu wieder den SMT100 in der Modbus Variante verwendet. Die Installation von ioBroker auf einem Raspberry Pi war problemlos. Dann habe ich den Modbus Adapter ausgewählt. Entscheidend sind die Einstellungen wie der USB Port für den angeschlossenen USB nach RS-485 Konverter.

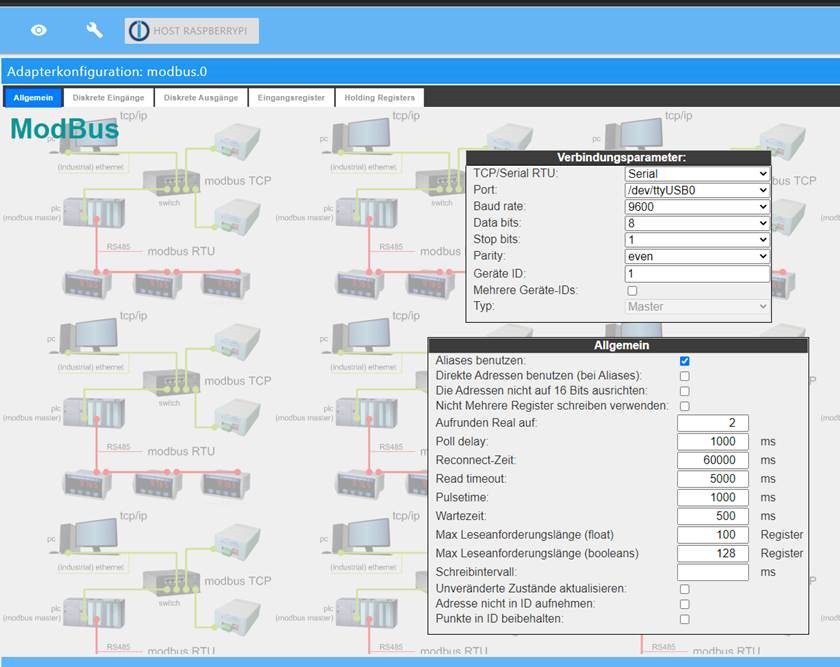
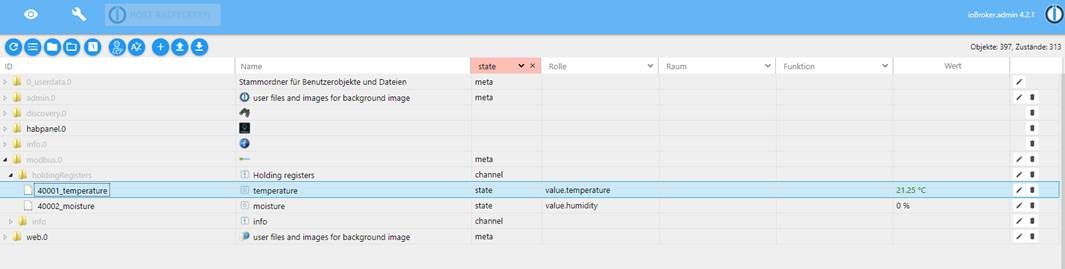
Danacht geht es an das "Eingemachte" mit den Registereinstellungen und der Umrechnungsformel für Temperatur und Wassergehalt.

Der Test mit den aktuellen Daten war sofort erfolgreich.

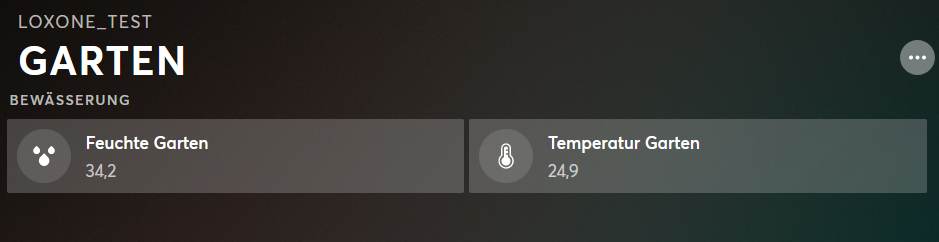
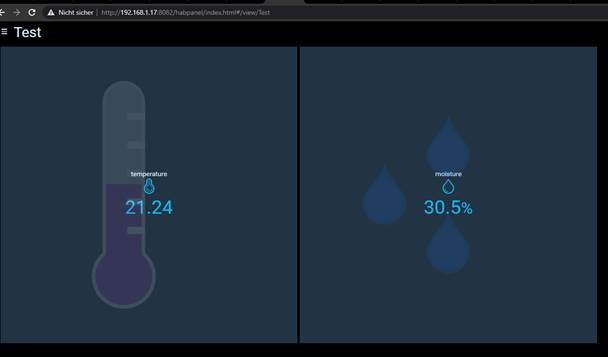
Nach ein paar weiteren Schritten war dann eine kleine Visualisierung erstellt.

Nach dem ersten erfolgreichen Test plane ich weitere Experimente mit ioBroker.

Soil moisture measurement with Loxone and SMT100

This is my first step in building an automated irrigation system with the Loxone Miniserver. Loxone is a manufacturer of smart home systems and became quite popular due to its medium price tag and good support of interfaces. I decided to give it a try and chose the Loxone Miniserver and the corresponding Modbus extension. With the Modbus extension it is possible to add up to 32 Modbus devices. If this is not enough you can add more Modbus extensions Here is how the Loxone Miniserver looks like.

.

With Modbus RTU it is quite simple to add a SMT100 to the Loxone. The SMT100 is available as Modbus version (please mention this when ordering). The manufacturer TRUEBNER provides an application note and a Modbus test program. I configured the SMT100 as Modbus device with address 1. Here is the configuration required by the Loxone. Please first add the Modbus extension to the Miniserver and then connect the SMT100 to the Modbus extension. Do not forget to power the SMT100.

Step 1: Modbus Extension

Set Baudrate to 9600 and Parity to even

Step 2: Modbus Device

Set Modbus address

Step 3: Add Sensor settings for temperature

I/O address 0

Command 3 (read holding registers)

Data type 16 bit unsigned integer

Step 4: Add Sensor settings for moisture

I/O address 1

Command 3 (read holding registers)

Data type 16 bit unsigned integer

Use conversion formulas (math block formula)

moisture: 16 bit value /100

temperature: 16 bit value / 100 - 100

Use virtual status blocks to display moisture and temperature on the website

This is the final result

If anyone needs a more detailed explanation how to setup Loxone with the Modbus Extension please send me an email at maria.gardenergranny@gmail.com.

Of course it is not a requirement to use Modbus for the SMT100 with Loxone. There are two more options. First option: Use the SMT100 with analog voltage output. Second option: Use the SMT100 ASCII with an RS485 Extension. For me Modbus was the most convenient choice. I know Modbus from the beginng. I still remember the good old times back in 1979 when Modbus came on the market and I developed a Modbus controller for my sewing machine.