Installation des Bodenfeuchtesensors SMT100

Endlich ist es wieder Frühling und ich kann es kaum erwarten meine neuen SMT100 Bodenfeuchtesensoren im Garten einzbauen. Bei Sonnenschein und 20°C macht es am meisten Spass. In dem Video unten wird gezeigt wie es geht. (Hinweis: Es gibt auch Einbauwerkzeuge vom Hersteller, aber in meinem Gartenboden schaffe ich das per Hand. Wichtig ist, dass der Einbau ohne Luftspalt erfolgt, also nicht zu sehr wackeln, sondern mit etwas Kraft in den Boden einstechen. Ggf. kann man den Boden vornässen, dann geht es besser. In der Nacht hatte es geregnet, so dass der Boden perfekt für den Einbau vorbereitet war. Der Einbau erfolgt im Rasen horizontal, wobei die grüne Messfläche vertikal stehen sollte. Man kann den Sensor auch vertikal einbauen, dann wird jedoch die Sonne das schwarze Sensorgehäuse erwärmen und die Temperatur etwas zu hoch angezeigt. In meinem Blumenbeet habe ich das so gemacht).

SMT100 with 4 - 20 mA interface

The 4 - 20 mA interface or current loop is still very popular in process control automation. There are a couple of advantages:

  • Only 2 wires are required (if sensor is low power and requires less than 4 mA current)
  • Voltage drop along the interconnection wires does not degrade accuracy, so extremely long cables are possible
  • Broken cable can be identified (no current)
  • High noise immunity (because of relatively high currents)

The disadvantage is:

  • Power consumption high and relatively high supply voltages required (typically 12 V to 24 V DC)

Generally I prefer digital interfaces like RS-485, but easy to use  4 - 20 mA sensor are ideally suited for my farmsite so that even untrained personnel can install or replace sensors without configuration hassle.

The choice of 4 - 20 mA sensors for soil moisture measurement is quite limited. Besides other disadvantages, Chinese sensors like Sonbus SM2801 or those from Rika are not real 2 wire sensors. A converter module by Vegetronix for voltage output sensors does not help as well since it requires an external power supply, so no real 2 wire solution as well. Even higher quality sensors like Gropoint are not a 2 wire solution. In the end I only found one real 2 wire solution which is from Decagon (now Metergroup) with their MAS-1 (and probably some OEM variants which look exactly the same). Unfortunately the manual of the MAS-1 contained an unpleasant surprise. The accuracy in volumetric water content is 6% which is mediocre but acceptable. What is more worrying is that the sensor air shall transmit approximately between 3.4 mA and 4.7 mA. I believe this is quite a very large tolerance since I hoped that at least in air it should be quite close to 4 mA. Fortunately a 4 - 20 mA variant of the SMT100 recently came on the market. I already own a couple of SMT100 with RS-485 interface for my garden irrigation system which are working fine, so I decided to give it a try with a SMT100 4 - 20 mA, which arrived these days. My first test was current measurement in air and the SMT100 was 4.03 mA, so right on spot. Even with 100 m cable length no degradation could be observed. So this is a good start for my upcoming farmsite project I hopefully can report on in the future.

How to install soil moisture sensors

Installation of a capacitive soil moisture probe is simple. However, there are a few important points which should be considered in order to achieve a good measurement result.

So here is some field work in my garden.

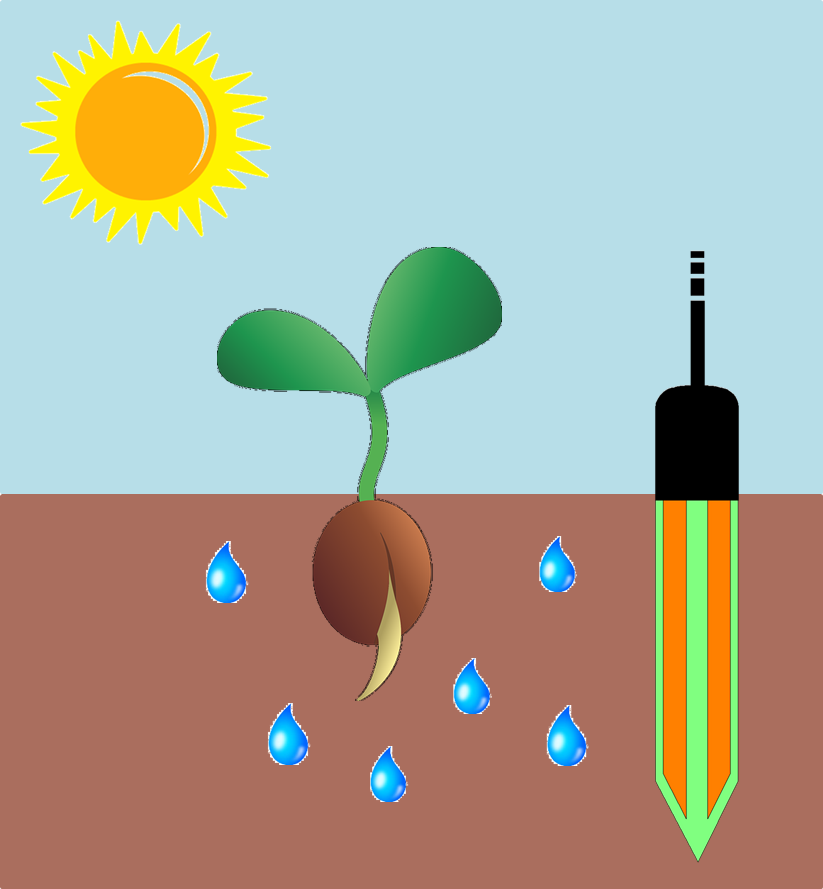
The figure below shows the correct installation of the SMT50 soil moisture sensor. It is mandatory to fully burry the probe including the black housing. A very good contact to the surrounding soil with no air gaps is very important because air gaps will lead to wrong soil moisture measurements. The density of the surrounding soil will influence the measurement signal. Make sure, the soil is properly compressed.


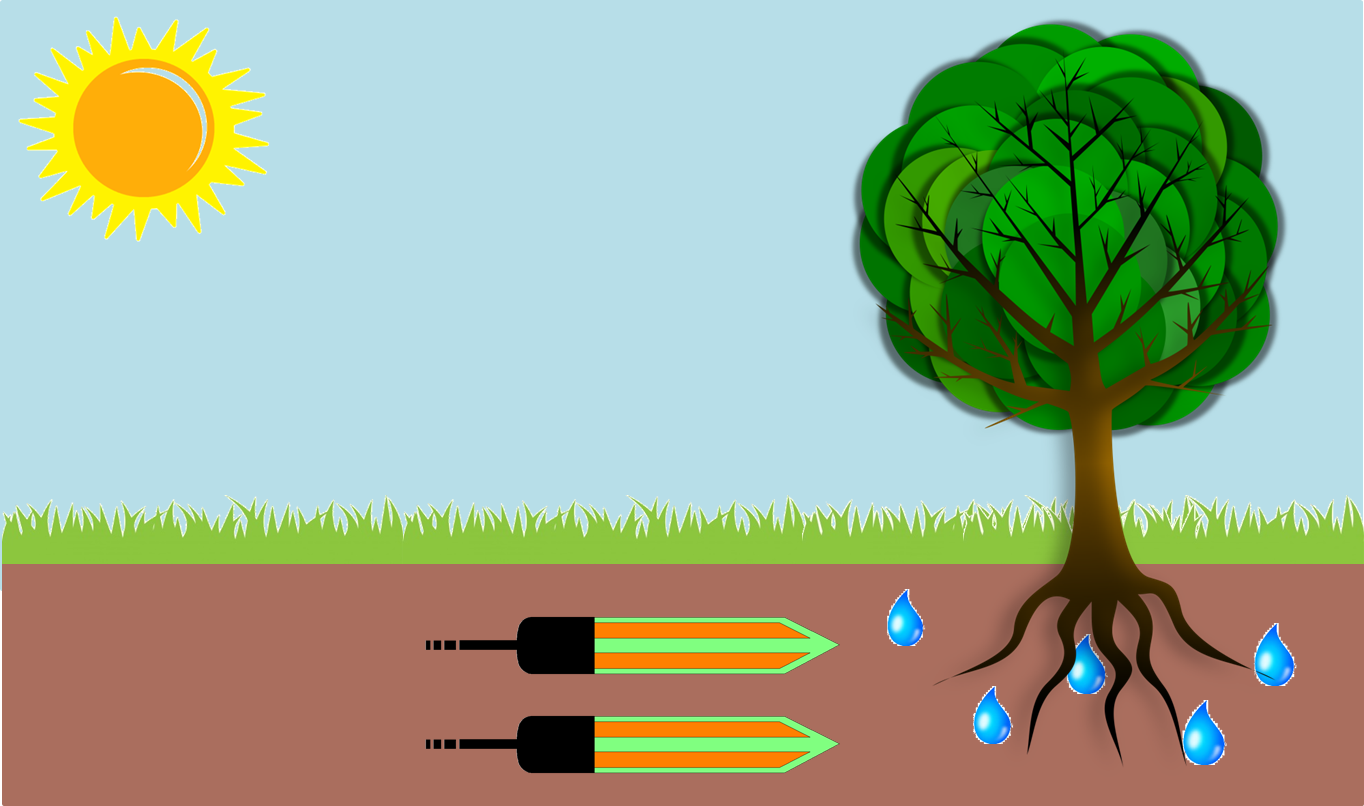
For irrigation purpose the SMT50 should be installed close to the roots of the plants. The ideal orientation of the sensor is a horizontal position. It is important to turn the sensor in an uprigth position so that no water can be accumulated on the surface of the green measurement area.

Sometimes it can be useful to embed two or more sensors in different depths. Then it is possible to see the penetration of the waterfront during the irrigation process. Based on this data the irrigation can be optimized.

Do not use a hammer for installation of the SMT50. If the soil is very compressed, it is recommended to use a punch or to soften up the soil by adding water.
 

The cable of the SMT50 is very robust and can directly be burried inside any type of soil. However, sometimes it can make sense to protect the cable against animal bites by using an additional ductwork.
 

Typical installation errors are shown below.

Temperature sensor is not burried in the soil -> Wrong temperature measurement

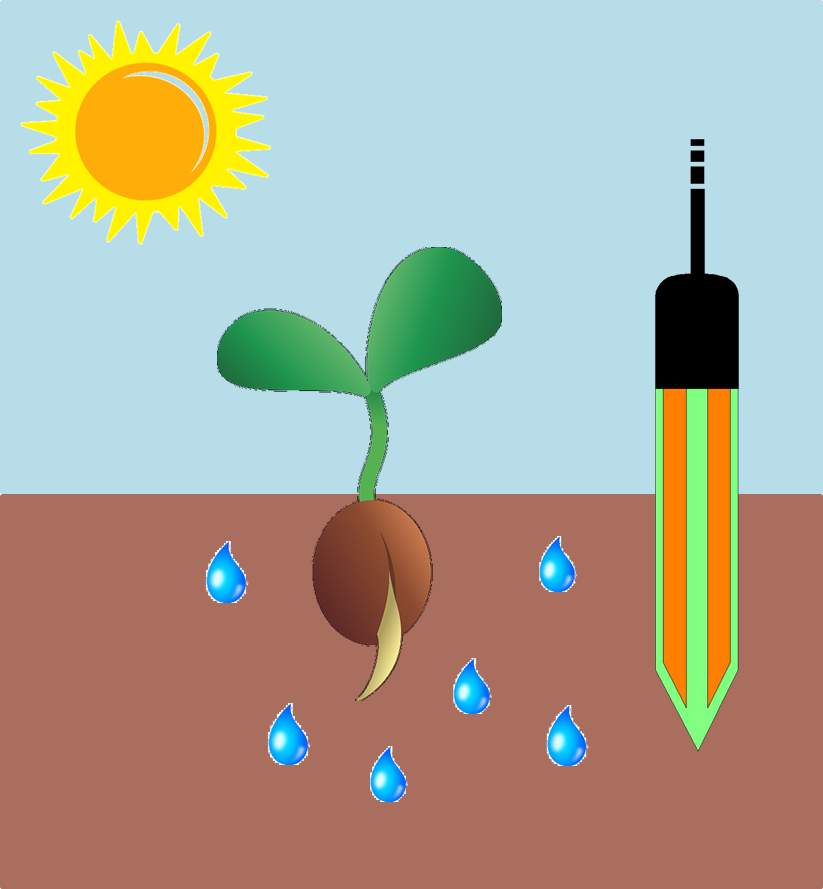
Measurement electrodes not fully burried -> Wrong moisture measurement

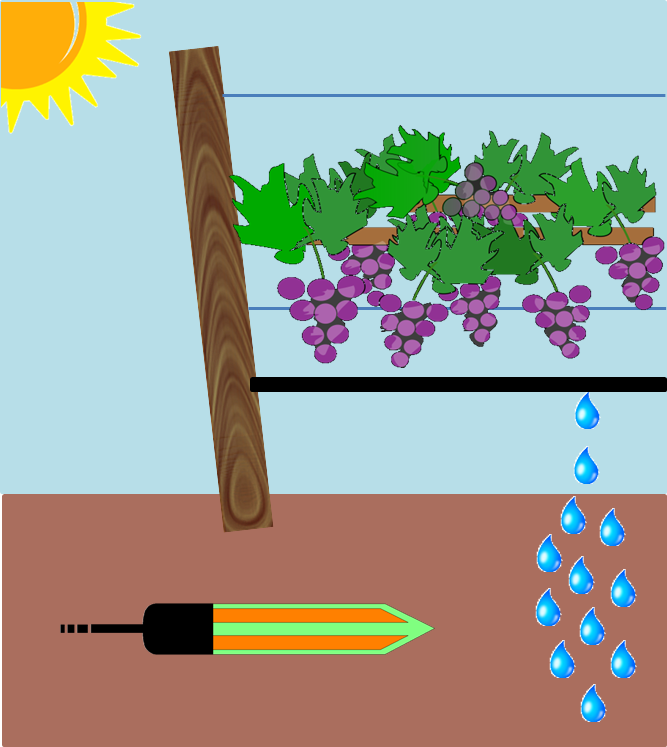
Large distance between sensor and dripping lines -> Sensor reacts to late / no reaction

Sensor is positioned to close to the wall of a pot -> Wrong moisture measurement

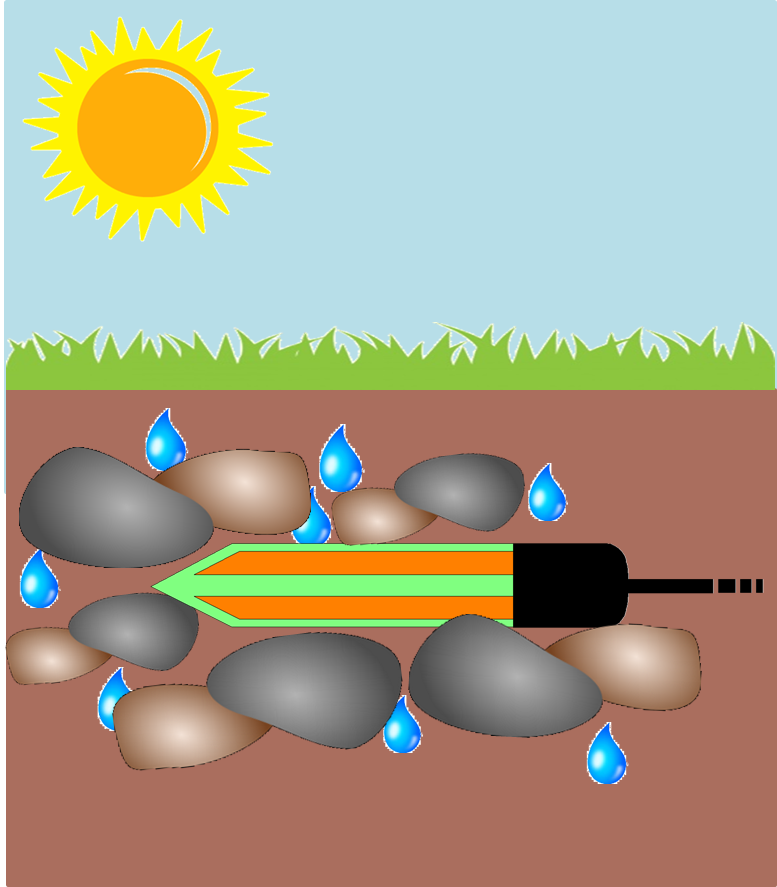
Sensor is inside granular material with air gaps -> Wrong moisture measurement

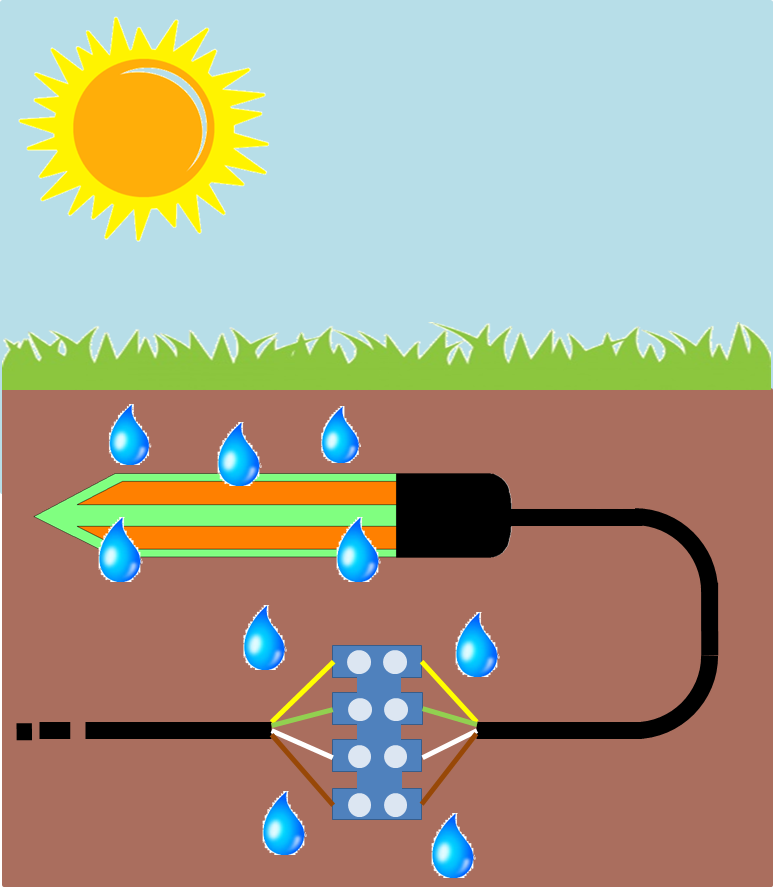
Cable connections inside the (wet) soil -> Wrong output signal of the sensor


Soil moisture sensor comparison

How to control irrigation? This is what I have been asked so many times. For me the answer is pretty simple. I do not trust weather forecast based irrigation control since rain amount can be extremely different from one to the other location especially in summer times with thunderstorms and other localized rain events. Therefore I recommend a couple of soil moisture sensors placed on site. But what kind and brand of soil moisture sensor to choose? There are so many sensors out there that is hard to decide which is the best one for your application. For price sensitive applications I now go with the TRUEBNER SMT50 after mixed experience with the Vegetronix VH400. I recently found a comparison between the SMT50 and the VH400 which shed light on the detailed technical differences between these sensors, see here.